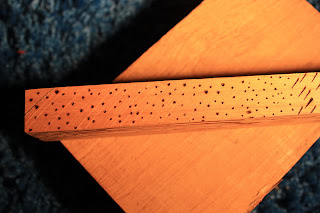
Jonathon let me take a few cut offs of wood to experiment with the pyrography pen. He gave me a range of light and dark wood to see how they work with the pyrography pen.
Woods I have;
- cherry
- elm
- oak
- jeluton
- beech
- ash
- tulipurced
- sapele
- walnut
- pine
I like the aesthetic the pen creates, I have started going along the grain of the wood as I have been warned it is quite difficult to create images against the grain. It gets a bit smokey.
Now I tried going againt the grain in smaller lines, it wasn't too bad on this wood.
I tried to draw some clouds, it was quite hard to keep the curved lines neat!
Dots and lines, seeing how different marks in the wood look.
After mark making and getting used to how to handle the pyrography pen I then tried to create an image onto a block of oak wood.
My friend Lucy had warned me that the tip of the pen becomes loose after a while and need tighening. It started to do this but as it is so hot I had to switch it off and let it cool before tightening. It made creating the image more difficult as the tip kept twisting as I was trying to make marks on the wood. I want to try more and see what images the other tips for the pen can create. I like this process and aesthetic of the lines and image on the wood.


Nice, I would like to see your results from the other woods too if you tried them.
ReplyDeleteI also have a tip that comes loose when it is hot - I have a pair of small pliers that I use to tighten it without having to let it cool down.